The Facebook advertising platform (also known as Meta for Business) has widely been touted as a place for marketers to see high returns on ad dollars. Its targeting and testing abilities allow for highly personalized ads in line with consumer interests and expectations, and can even allow for dynamically served product ads based on user behavior. For ecommerce companies to truly see the value of the Facebook advertising platform, the Facebook pixel, pixel events and Conversion API need to be properly implemented. For companies already on popular ecommerce platforms such as Shopify, BigCommerce, NetSuite or WooCommerce, the implementation is straightforward and only takes a few minutes. This post dives into the pixel’s benefits, use cases, common issues and also provides high-level instructions for how to set up a Facebook pixel.
With the iOS14 updates in 2021, the Facebook pixel setup requires a few additional steps. These updates are critical because with less than 4% of users opting into tracking consent, a lot of data is being lost. If you’re creating a new pixel we’ll cover all the steps below, and we’ve created a helpful checklist for site owners who had a pixel installed prior to the iOS14 updates.
Meet Dan
Dan is a marketing manager at a mid-sized clothing retailer. Working in his office on a Thursday afternoon, he hears a knock on the door followed by his boss, the CMO, popping his head in.
Great, Dan is thinking, here comes another random request that I will have no experience or internal resources to fall back on.
Right on cue, the CMO asks,
“Why aren’t we utilizing the Facebook advertising platform? I just listened to a podcast that said Facebook is the platform with the highest ROIs for paid initiatives!”
“We’ve run quite a few test engagement campaigns with boosted posts, but it is difficult to measure success without a dollar amount attached to impressions. However, I’ve been reading more about the Facebook Pixel and learned you can uncover more data and dynamically target product ads.”
His boss is intrigued at the prospect of these capabilities and after a brief back and forth decides to devote a $5,000 test budget and the necessary time from Dan and the rest of the team to undertake setting up the pixel and running a test campaign.
Dan is eager to get started, but when he sits down to begin to create his Facebook pixel, he has a lot of questions.
“How does a Facebook pixel work?”
“Where do I find my Facebook pixel?”
“How do I add a Facebook pixel to Shopify?”
He’s got a lot of work ahead of him. Luckily, this article should cover everything he needs to know.
Getting Started with the Facebook Pixel
Getting approved for new projects and initiatives is always exciting for about the first 10 minutes, then you realize you actually need to execute on all the things you just sold in! Here’s what you’ll need to get started:
- If you have a development team, you’ll probably want to secure their support to help with the initial setup (if not, no worries, we’ll walk through step-by-step how to do it).
- You will also want to be sure to familiarize yourself with the different types of events and what can be done with them (more on this below).
- Depending on the type of campaign you want to run, gathering item data to be uploaded as a product catalog may also need to be undertaken. Keep reading for more details.
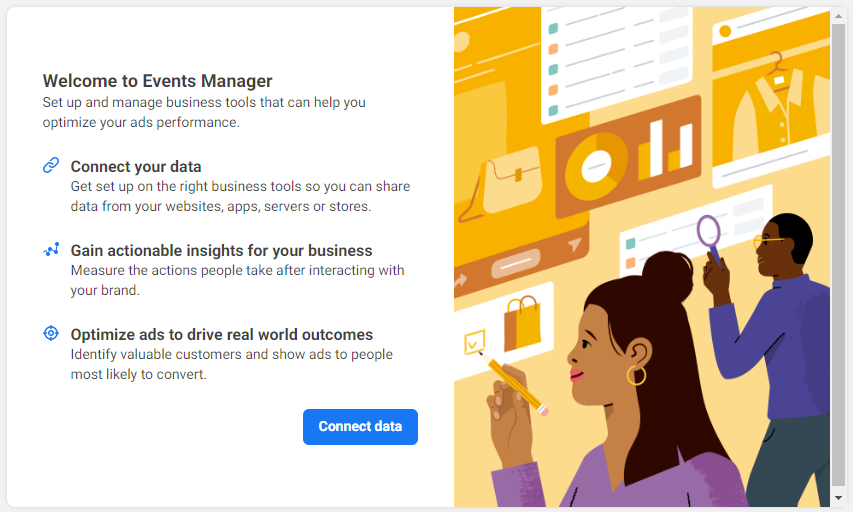
High Level Pixel Overview
Like any tracking pixel, the Facebook pixel is a 1×1 pixel that tracks user behavior and traffic on a website. This pixel contains two parts: the base code and the event code.
Install the Facebook Pixel by dropping the base code into the header of every page on your site or implement it with an integration such as Shopify, WooCommerce, or Google Tag Manager. The base code is used to bring forth data about page views on your site.
The event code takes it one step further than the base code by triggering the Facebook pixel to fire when specific actions happen on your site, such as a purchase or a viewing specific products. Below, we’ll show you how to install your pixel, how to get your Facebook pixel code, and how to get data from your Facebook pixel to track conversions or create custom audiences for retargeting ads.
Step 1: Creating Your Pixel
Before exploring the different ways to utilize the Facebook Pixel, you’ll need to create one and get it set up.
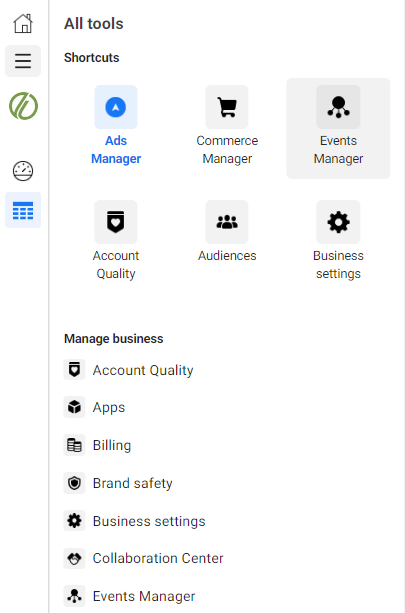
To create a Pixel, access the “Pixels” tab in the Facebook Ads Manager (see image below).
Step 2: Setting Up Your Pixel
How you setup your pixel will depend on your role and expertise within your organization and the current tools being used. If your site is hosted on a popular ecommerce platform such as WooCommerce, BigCommerce or Shopify the integration should be even easier. If you’re on NetSuite, integrating with Google Tag Manager is a great way to go. Easier still, if you have a development team to handle changes to your site’s code, you can simply email instructions to your developer straight from the pixel setup page (shown in the below two images).
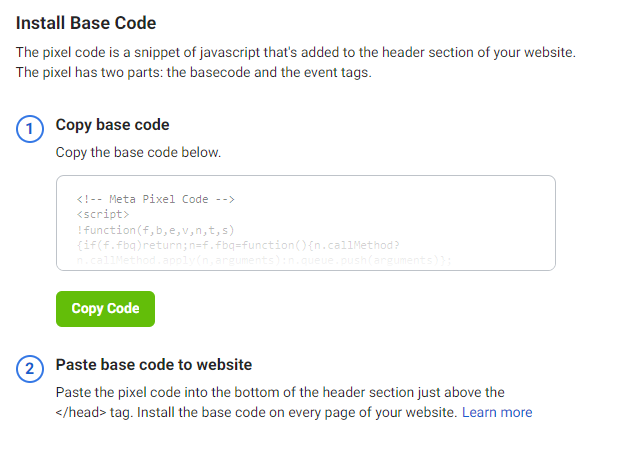
In case you are on your own, this portion of the post will focus on manually installing the code. A guided wizard will take you through the process step-by-step. To begin, click into the option as shown in the above photo. Installing the pixel code has two parts:
- The base code
- The event code(s)
Base Code
The base code of the pixel tracks traffic to your site for users who are logged into Facebook and is placed in the global header of your site. Once you place the base code in the header, there is a built in tool to send test traffic to be sure the base code is firing correctly before continuing to the event codes.
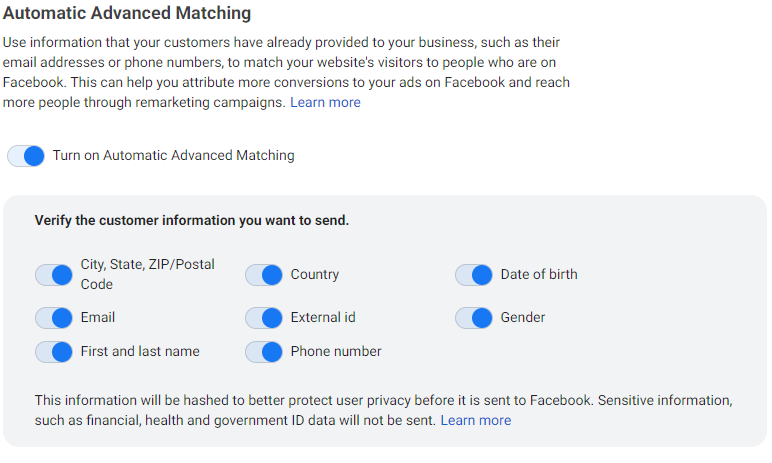
Automatic Advanced Matching
The next step will ask if you want to turn on Automatic Advanced Matching. To take full advantage of pixel data, Tadpull recommends turning on Automatic Advanced Matching for all the options below.
Event Code(s)
The event codes are truly the fun part of the pixel and allows for targeted advertising based on specific actions users have taken on your site.If you are using one of the partner integrations above, your events will start tracking automatically and you can skip to the next section. If you are manually setting up the pixel, there are two options for setting up events. You can use the event setup tool, which allows you to set up events without changing website code. You can also choose to set up the code manually, which Tadpull only recommends if you have an experienced developer.
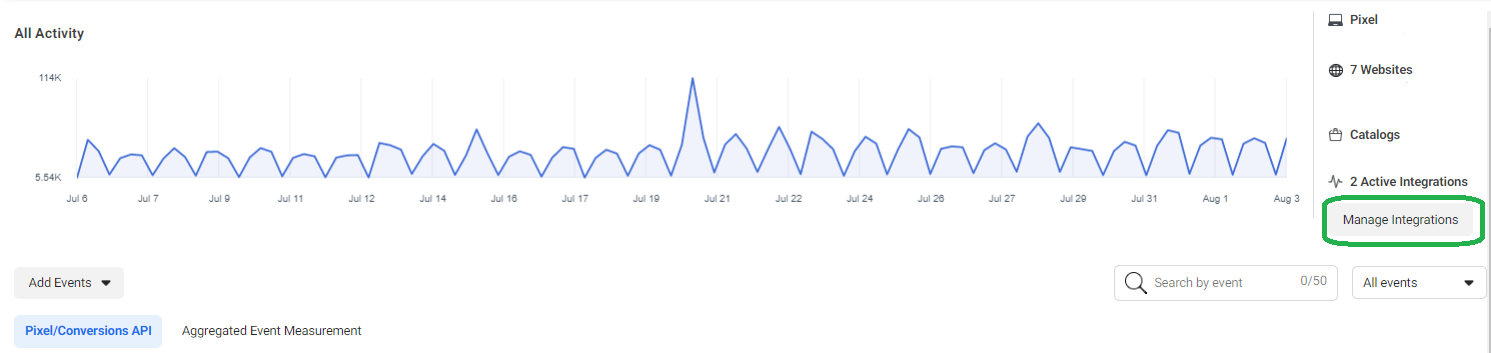
Aggregated Events Measurement
One of the major impacts of the iOS14 updates is that brands are limited to optimizing for only 8 events (previously this was unlimited). That’s why it’s important to tell Facebook what conversion events to use and how these events should be valued and prioritized.
How to do this:
- Navigate to Data Sources > Your Pixel
- Click Aggregated Event Measurement
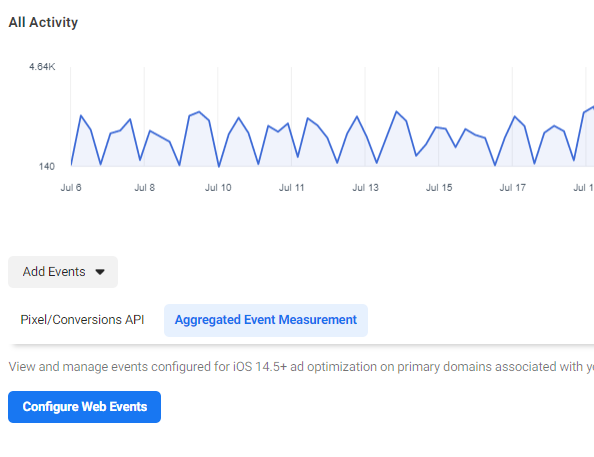
- Click Configure Web Events > This will take you to a new page
- On the next page, find your Pixel. Here you should be able to select “Manage Events”

- Select up to 8 conversion events you would like to optimize ads for, and prioritize them from highest to lowest
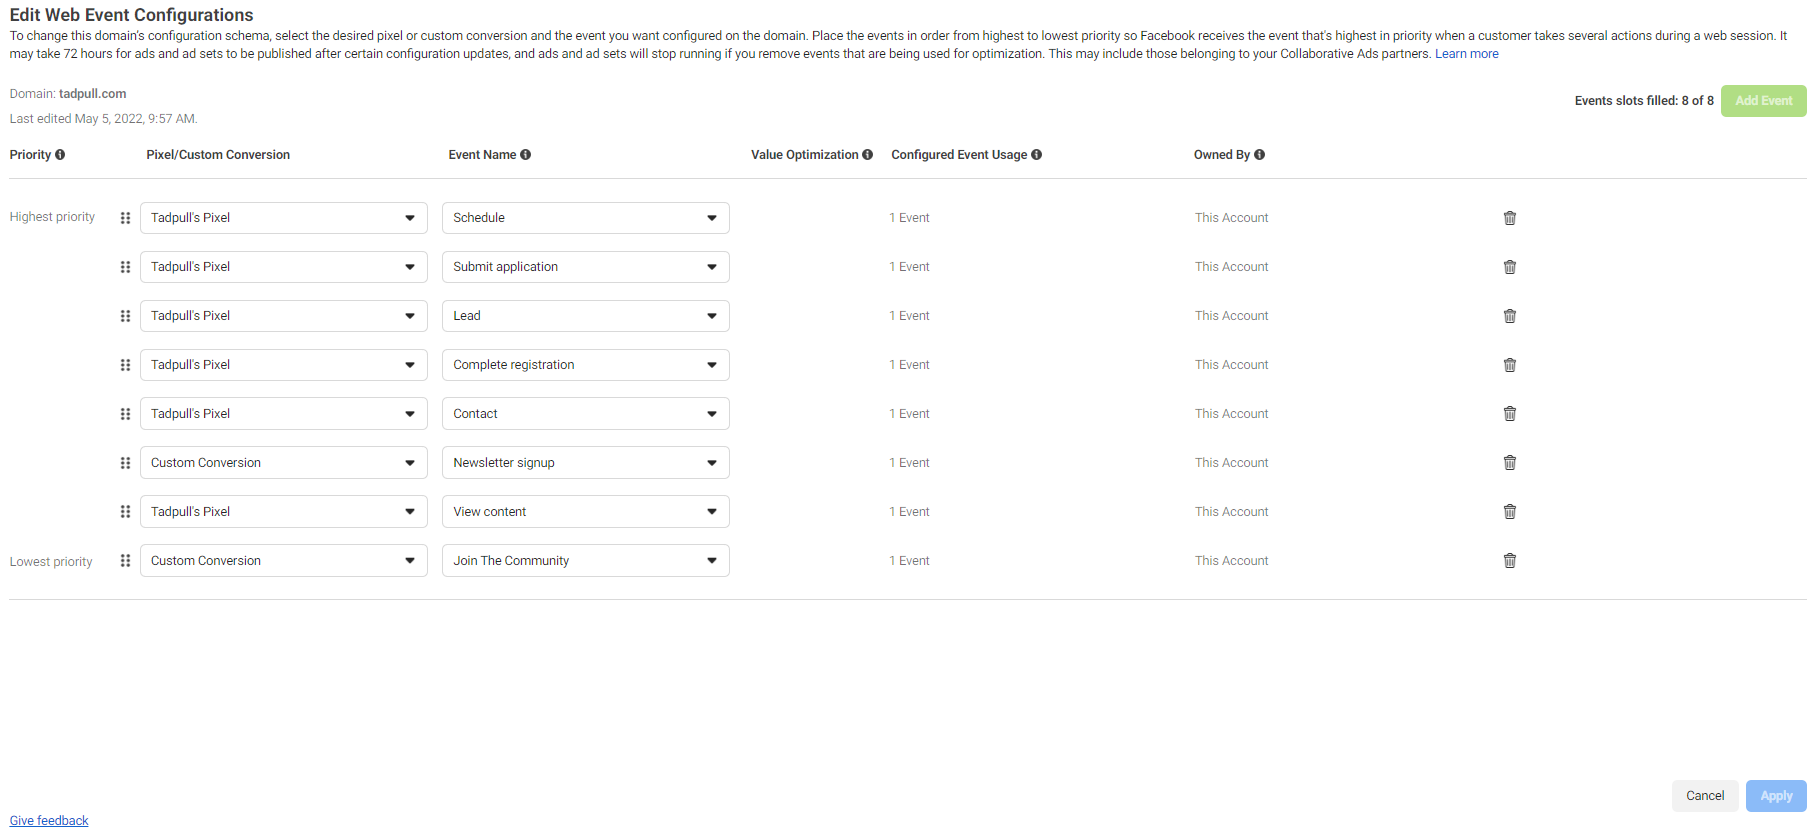
Events Tadpull Recommends Ecommerce Brands Prioritize:
- Purchase (user completed a purchase and receives order confirmation)
- Add Payment Info (user added their credit card info and saves billing info)
- Initiate Checkout (user starts the checkout process i.e clicks the checkout button)
- Add to Cart (user adds an item to a shopping cart or basket)
- View Content (user visits a web page’s URL i.e product or landing page)
- Lead (user submits their info with understanding that they may be contacted by your business at a later time)
Bonus Step: Conversions API
If you’ve made it this far, congratulations, you’ve installed the Facebook pixel and pixel events! With the loss of data from the Facebook Pixel due to iOS14 and more browsers retiring the use of cookies, it’s also highly recommended to set up the Conversions API. While the pixel tracking method uses a browser to send information, the Conversion API allows you to share key web events or customer actions directly from your server to Facebook’s.
For example, if a user purchases a product after clicking a Facebook ad, the API tracks that data through your server and sends the information back to Facebook. With Apple’s iOS 14 privacy changes, the traditional pixel/browser tracking method might not fire in this scenario if the user had opted out of tracking consent.
The Conversions API works alongside your Facebook pixel to help improve the performance and measurement of your Facebook ad campaigns. The shift to server-side tagging (as this type of tracking is called) will most likely become the standard method to track user’s actions across paid platforms in the near future. If you are using a partner integration, check out their documentation for setting up the Conversion API. If your pixel was set up manually, check out Facebook’s Conversion API documentation.
Utilizing Your Pixel Event Data
Now that your shiny new pixel and its accompanying events are firing, you get to utilize this data in ways that make marketers feel like a kid in a candy store.
Product Catalogs
Product catalogs are a great way to take advantage of pixel data flowing into Facebook. We can create product catalogs and product sets within catalogs to give users the chance to jump straight to checkout from Facebook based on a variety of strategies. These can be uploaded manually or automatically updated via a feed.
Retargeting/Abandoned Carts
Retargeting, in general, is often the impetus for creating and installing the pixel in the first place, and for good reason. Retargeting users who have viewed specific products, but not checked out are prime to convert, as are those who have taken a step further and added to cart.
Cross/Upselling
Beyond simply trying to sell products in which users have shown interest, we can also use pixel events to help cross and upsell users. By displaying products that pair well with items a user has either purchased or used, we can increase our chances of being able to sell additional product while the momentum is strong.
Leads
An often overlooked way to utilize event data is gathering leads directly from Facebook. Targeting users who have viewed educational pieces of content such as a blog, or simply viewed products are prime for signing up for an email list. Consider running a lead generation campaign based on criteria from your Facebook events to gather emails from people engaging with your site.
Common Mistakes and Issues
Here at Tadpull, we work closely with digital marketers and have a unique perspective on some of the different challenges and mistakes that often occur when implementing and managing the Facebook pixel.
Mistake #1 – Not Defining Conversion Values
One of the most common mistakes we see marketers make when it comes to the Facebook pixel is not defining conversion values. Attaching a dollar amount to various actions a user takes on your site allows for more in-depth analysis and optimization based on ROI. This is not to say each event needs a conversion value, defining a product view for instance with a dollar amount may be extrapolating too far. However, at the very least including the product ID within parameters will allow for product based granularity.
How to avoid it: Defining a purchase event’s conversion value is usually pretty straight forward (the selling price of the purchased item). However, when it comes to events like AddToCart, Lead, or ViewContent using a combination of your sales funnel data and average order values often makes sense. For instance, if you know on average how often users complete checkout after adding to cart, you can divide your average order value over the percent that complete checkout to get a rough estimate of the conversion value for your AddToCart event.
Mistake #2 – Not Comparing Pixel Data to Other Data Sources
The Facebook pixel is only as good as the data that comes from it. Being sure your data is accurate will be key for campaign optimization and reporting going forward.
How to avoid it: Cross reference what Facebook reports with Google Analytics. Checking the number of purchases and page views on a day-by-day basis compared to Google Analytics can help you validate the quality of your pixel data. An important note to keep in mind is that Google Analytics should report slightly higher numbers of conversions and page views compared to your pixel. This is because the pixel will only be able to track events on your site if those users are logged into Facebook.
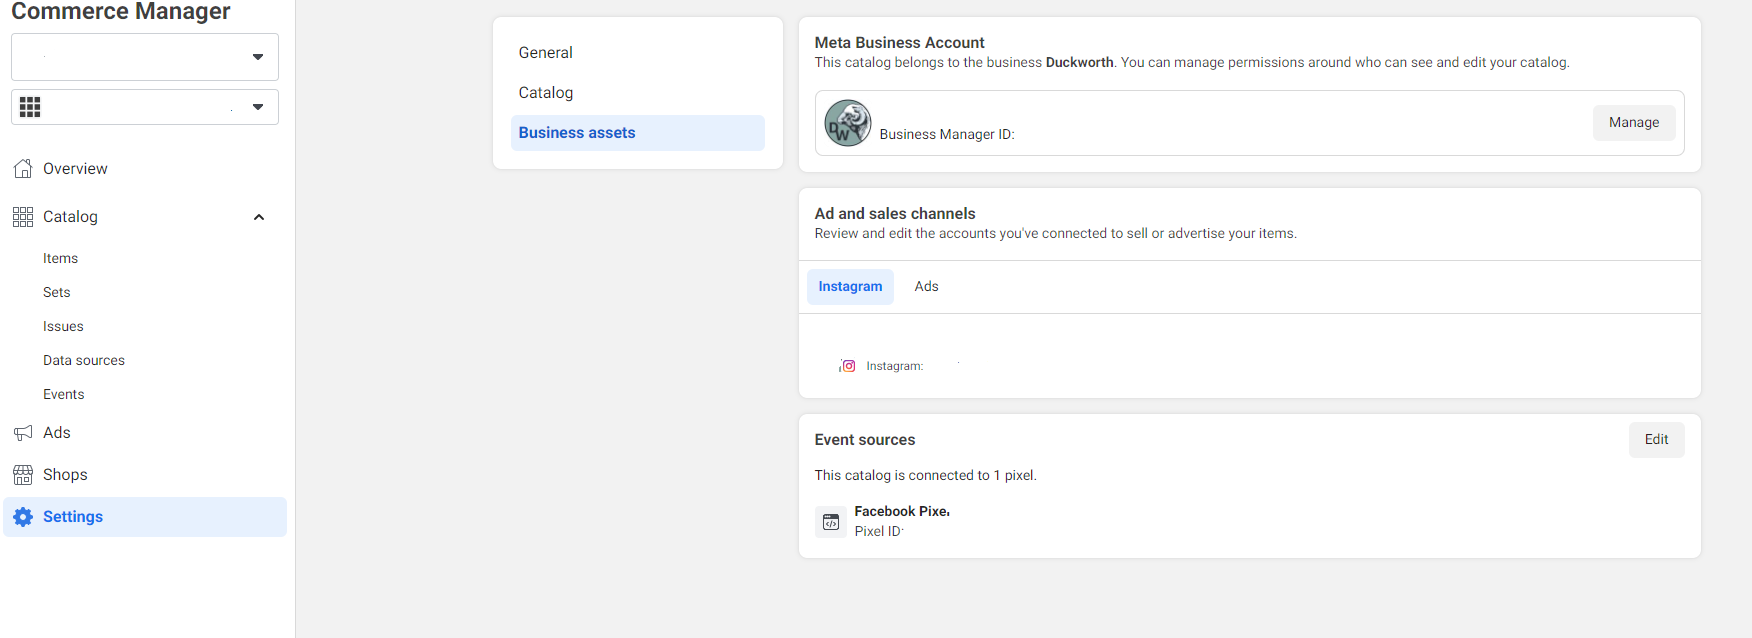
Mistake #3 – Not Associating Your Catalog to Your Pixel
Not associating your product catalog to your pixel will lead to errors and delivery issues for your campaign and is something that could easily be overlooked.
How to avoid it: To be sure your catalog is associated correctly, access “Commerce Manager” from the main dropdown and click into “Settings”. From here, find “event sources” and be sure your catalog is associated to the correct pixel.
Mistake #4 – Not verifying your domain
As part of the iOS14 updates, Facebook now requires advertisers to verify their domain. If your domain isn’t verified, you lose the ability to configure Aggregated Events. To implement domain verification, you need to choose between different methods:
- Add a DNS TXT entry to your DNS record to confirm that you own the domain
- Upload an HTML file provided by Facebook to your web directory and confirm domain ownership in Business Manager.
- Add a meta tag to the section of your domain home page
How to verify your domain:
- Log into Business Manager
- Navigate to Settings, then Brand Safety > Domains
- ‘Add a New Domain’ and enter your domain name
Next, you’ll be able to choose from two ways to verify: DNS Verification or HTML File Upload. Detailed instructions will be provided for both options.
Facebook has a helpful article and 2-minute video on how to verify your business domain.